
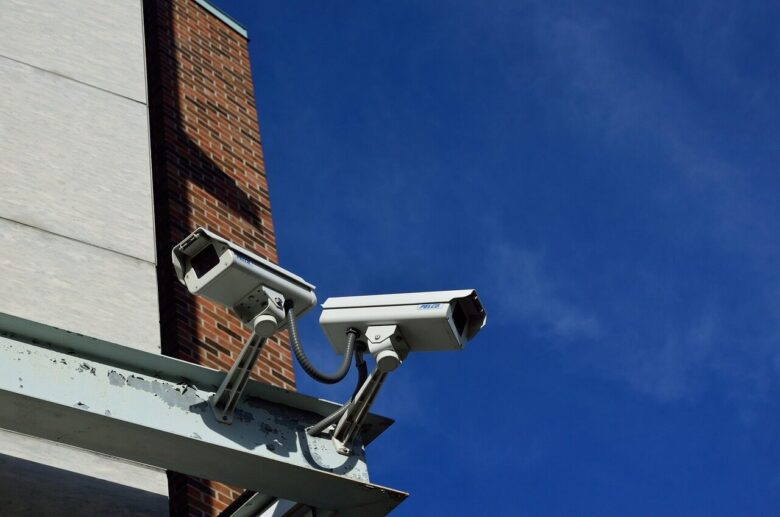
What if your security cameras could distinguish people, vehicles, animals, and packages without sending every recorded event to a conventional cloud surveillance service?
HomeKit Secure Video can provide encrypted event recordings, local analysis through an Apple home hub, Apple Home notifications, and basic smart-home automations. Integrating an AI-equipped camera still requires careful decisions about camera compatibility, iCloud+, networking, storage, and whether an unofficial bridge is appropriate.
It is also important to set realistic expectations. Apple Home can classify supported object types and identify familiar faces, but it does not determine whether someone is a genuine threat. It is not a continuous-recording network video recorder, generalized anomaly detector, or enterprise video-management platform.
What HomeKit Can—and Cannot—Do with AI-Powered Surveillance Cameras
Basic Apple Home camera compatibility and HomeKit Secure Video support are not the same thing. A camera may provide live video in the Home app without supporting encrypted event recordings, Apple’s object classifications, Activity Zones, or iCloud video history. Check the exact camera model and its stated features rather than assuming that every product from a compatible brand offers the same integration.
With a supported camera and configuration, HomeKit Secure Video analyzes video locally on an Apple home hub and stores end-to-end-encrypted event clips in iCloud. It can classify people, animals, vehicles, and packages. Recordings are retained for 10 days and do not count against the subscriber’s normal iCloud storage quota.
Apple currently lists the following iCloud+ camera allowances:
- 50 GB: one camera
- 200 GB: up to five cameras
- 2 TB or higher: an unlimited number of cameras
You also need a supported home hub. On the current Apple Home architecture, that means a HomePod, HomePod mini, or Apple TV. An iPad is not supported as a home hub on the latest architecture. The hub is needed for HomeKit Secure Video, remote access, and automations.
What Apple’s video intelligence actually provides
- Object classification: Apple can distinguish people, animals, vehicles, and packages for recording and notification settings.
- Familiar-face identification: Home’s Face Recognition feature can use tagged people from the Photos library or recently captured visitors. This is different from enterprise facial search or forensic identification.
- Activity Zones: Zones can focus recordings and notifications on selected parts of the image.
- Event recordings: HomeKit Secure Video stores detected clips rather than providing a conventional, continuous 24-hour recording timeline.
HomeKit does not natively provide license-plate recognition, crowd analytics, broad “unusual activity” detection, or advanced forensic video search. If a camera or NVR has proprietary AI features, those features may continue working in its own application, but they are not automatically converted into native HomeKit Secure Video events.
Package detection has a practical limitation: the delivered package needs to remain visible within the camera’s view. A camera aimed too high, blocked by a railing, or positioned where a parcel immediately leaves the frame may not provide a useful package alert.
Choose an Integration Method
There are three main ways to bring a surveillance camera into Apple Home. Native HomeKit Secure Video is generally the least complex option. Scrypted and Homebridge can extend compatibility, but both are unofficial, community-supported integrations rather than Apple-certified camera bridges.
| Integration route | Best suited to | Advantages | Limitations |
|---|---|---|---|
| Native HomeKit Secure Video | New installations where Apple Home support and simpler maintenance are priorities | Direct pairing, encrypted event history, Apple classifications, and fewer intermediary components | Limited selection of compatible models; event recording rather than continuous NVR storage |
| Scrypted | Supported IP cameras or NVR platforms that need to be exposed to Apple Home | Camera-focused plugins and HomeKit Secure Video integration for supported configurations | Unofficial; results depend on the model, plugin, codec, motion events, host hardware, and network |
| Homebridge | Homes already using Homebridge or devices covered by a suitable community camera plugin | Broad community ecosystem and support for many non-camera accessories | Camera and recording features vary by plugin; updates can introduce compatibility or maintenance issues |
Examples of specific native products include Logitech Circle View, Eve Cam, and Eve Outdoor Cam. Compatibility should always be confirmed for the exact product, region, and current firmware. Do not treat brand-level support as confirmation that every camera in that company’s range supports HomeKit Secure Video.
How to Connect a Native HomeKit Secure Video Camera
- Confirm the model’s capabilities. Look specifically for HomeKit Secure Video recording support, not just Siri, Apple Home, or HomeKit compatibility.
- Prepare the home hub and account. Confirm that the HomePod or Apple TV is online, assigned to the correct Home, and using current software. Verify that the iCloud+ plan supports the intended number of cameras.
- Update the camera safely. Follow the manufacturer’s instructions to install current firmware and replace any default credentials before adding the device.
- Add the camera in Apple Home. In the Home app, select Add Accessory, scan the HomeKit setup code, assign the camera to a room, and give it a clear name.
- Configure streaming and recording. Set separate behavior for when people are home and away. Available choices generally include Off, Detect Activity, Stream, and Stream & Allow Recording.
- Choose recording and notification criteria. Select the object types that matter, configure Activity Zones, and avoid including busy sidewalks, moving trees, or public roads unless necessary.
- Test the camera. Verify live video, event recording, notifications, night images, and home-versus-away behavior before treating the setup as operational.
A front-door camera, for example, can be configured to record selected motion events and notify the household when Apple classifies a person or package. The porch light can be controlled by a separate motion-based automation after sunset. Recording itself is governed by the camera’s Stream & Allow Recording settings rather than by an independent “start recording” automation.
If installing a hardwired product such as Eve Outdoor Cam, follow the manufacturer’s wiring instructions. That camera requires suitable neutral and grounding conductors. Fixed electrical work should be performed by a qualified electrician when required by the product instructions or local electrical code.
How to Connect an Unsupported Camera with Scrypted or Homebridge
Scrypted and Homebridge run on an always-available local device, such as a compatible computer, server, NAS, or single-board computer. They receive a camera’s local stream and expose it to Apple Home through the appropriate integration or plugin.
These platforms are unofficial. Homebridge explicitly describes itself as community-maintained and not certified or endorsed by Apple or device manufacturers. A bridge may need camera or NVR credentials and will process local video streams, so plugin provenance, updates, account security, and host maintenance are important parts of the decision.
Recommended bridge workflow
- Check support before installing anything. Confirm that the exact camera, NVR, firmware, and required features are supported by the relevant plugin. Live video support does not necessarily guarantee HomeKit Secure Video, two-way audio, doorbell functions, or motion events.
- Secure the camera and bridge host. Update firmware, replace default passwords, enable multifactor authentication where available, and keep the bridge operating system and plugins current.
- Keep the camera reachable locally. Use Ethernet for PoE cameras where practical. Create a DHCP reservation—or otherwise provide a stable local address—instead of manually selecting an address that could conflict with the router’s DHCP pool.
- Use the most specific integration available. For Scrypted, a manufacturer-specific plugin is generally preferable, followed by ONVIF when supported. A generic RTSP connection is a fallback because it may not carry all motion, audio, or device features.
- Verify the stream format and events. HomeKit integrations normally need a usable H.264 stream and reliable motion events. Resolution, audio, substreams, transcoding, and NVR behavior vary by model.
- Add the bridge or camera to Apple Home. Follow the bridge documentation to pair the accessory. Scrypted recommends pairing cameras individually for its HomeKit integration.
- Test every required function. Check live view, event recording, notifications, audio, night mode, and recovery after restarting the camera and bridge host.
Reolink provides a useful example of the distinction. Reolink states that its cameras do not natively support Apple HomeKit, although supported models may be imported through Scrypted. That process involves more than simply turning on RTSP: model support, the selected plugin, motion events, codec settings, NVR topology, and desired audio features all affect the result.
Scrypted documents integrations for camera platforms including Reolink, UniFi Protect, Hikvision, and Amcrest. This does not mean every model or feature is supported. Nor does it prove that Scrypted will always be faster or more reliable than Homebridge; live-view performance depends on the camera stream, network, bridge hardware, transcoding requirements, software versions, and plugin quality.
If continuous recording, long retention, redundant storage, license-plate capture, or forensic search is required, keep a suitable NVR or video-management system operating alongside Apple Home. HomeKit Secure Video can serve as the household notification and encrypted event-viewing layer without replacing the primary recorder.
Configure Automations, Notifications, and Face Recognition Correctly
Apple distinguishes between a camera’s motion sensor and HomeKit Secure Video’s object classifications. Classifications can control which events are recorded and which notifications are delivered. Apple’s documented Home automations use motion-sensor activity as a trigger; they do not clearly provide a universal “person detected” trigger for turning on another accessory.
A defensible exterior-light automation is therefore:
- When the camera’s motion sensor detects motion;
- Only after sunset or during selected hours;
- Turn on the porch or driveway light;
- Turn it off after an appropriate interval.
Activity Zones can improve recording and notification relevance, but Apple notes that they do not alter motion-detection automations. A vehicle outside the selected recording zone could still activate an automation based on the camera’s general motion sensor.
Face Recognition in Apple Home can identify familiar people using tagged faces from Photos or recent visitors. It should not be described as enterprise-grade facial analytics, and identification may be missed or incorrect. Avoid using it as the sole basis for unlocking doors, disabling alarms, or making safety-critical decisions.
HomePod can provide supported visitor or doorbell announcements when recognition and notification settings permit, but it cannot display camera video. Use an iPhone, iPad, Mac, or Apple TV to view the feed. The exact announcement options depend on the camera or doorbell and the current Apple Home configuration.
Optimize HomeKit Secure Video Without Weakening Privacy
Indoor and outdoor cameras do not need identical rules. Indoor cameras can be set to Stream Only, Detect Activity, or Off while household members are home, then changed to Stream & Allow Recording when everyone leaves. Outdoor cameras may need recording enabled more consistently, but their zones and notification criteria should still be limited to relevant areas.
- Aim deliberately: include entry paths and delivery areas while avoiding neighboring windows, private yards, and unnecessary public space.
- Use focused classifications: enable only the people, animal, vehicle, or package alerts that are useful for that location.
- Check night performance: reflections from glass, walls, eaves, and nearby objects can reduce the usefulness of infrared images.
- Avoid excessive bridge layers: every additional bridge, plugin, and account increases maintenance and troubleshooting complexity.
- Use a stable network: weak Wi-Fi, congested channels, packet loss, and unnecessary transcoding can contribute to delayed live views or missed events. See the guide to reducing latency in wireless 4K security cameras.
Common problems and checks
| Problem | User-safe checks |
|---|---|
| No encrypted recordings | Confirm the iCloud+ camera allowance, home-hub status, Stream & Allow Recording setting, and recording criteria. |
| Live video is slow or unavailable | Check local connectivity, Wi-Fi signal, Ethernet links, camera restarts, bridge status, and whether the bridge is transcoding an incompatible stream. |
| Motion appears but no classified events are recorded | Review Activity Zones, lighting, camera angle, recording criteria, motion-event delivery, and bridge plugin documentation. |
| Package alerts are missed | Make sure the delivery area remains visible and that packages are not immediately hidden by walls, planters, doors, or railings. |
| A bridge stops working after an update | Check plugin compatibility notes and logs before reinstalling. Restore from a known configuration backup if the platform supports it. |
Cybersecurity, Privacy, and Legal Considerations
HomeKit Secure Video’s encrypted iCloud recordings do not automatically prevent the camera from communicating with its manufacturer. Privacy behavior varies by brand and configuration. Logitech, for example, has stated that a HomeKit-only Circle camera may still contact Logitech services to check for firmware updates.
Third-party bridges add another trusted device to the local network and commonly receive camera or NVR credentials. To reduce avoidable risk:
- Install camera, router, NVR, bridge, and plugin security updates.
- Replace default usernames and passwords with unique credentials.
- Enable multifactor authentication where the manufacturer offers it.
- Do not expose RTSP streams, bridge dashboards, NVR interfaces, or camera administration ports directly to the internet.
- Consider a separate IoT network if the router supports it, while preserving the local discovery and communication Apple Home requires.
- Remove abandoned plugins and revoke credentials when a camera or bridge is retired.
Camera placement and audio recording can create legal and privacy obligations. Rules vary by country, state, and locality; several U.S. states require all-party consent for recording private conversations. Avoid bedrooms, bathrooms, neighboring private areas, and other places where people have a strong expectation of privacy. Verify applicable surveillance, audio-recording, signage, employment, landlord, and homeowners’ association requirements before installation.
AI classifications and notifications can fail, arrive late, or identify an object incorrectly. They should supplement appropriate locks, lighting, alarms, and household procedures—not function as guaranteed threat detection or a life-safety control.
Practical Takeaway
The most straightforward integration is an exact camera model with native HomeKit Secure Video support, a compatible Apple home hub, and an iCloud+ plan sized for the number of cameras. Configure recording and notifications separately, use motion rather than assumed person classification for automations, and test every mode before relying on the system.
Scrypted or Homebridge can make an existing IP camera visible in Apple Home, but they introduce plugin, credential, codec, update, and hardware dependencies. Use a bridge only after confirming exact model support and deciding which features must remain in the camera manufacturer’s application or NVR.
- Choose native HomeKit Secure Video for lower integration complexity and encrypted Apple event history.
- Choose an unofficial bridge carefully when preserving compatible existing cameras is more important than plug-and-play setup.
- Keep a separate NVR when continuous recording, longer retention, redundancy, or forensic tools are required.
- Review privacy and security settings after firmware, Apple Home, camera, or bridge updates.
Sources and references
- Apple Support: HomeKit Secure Video storage and iCloud+ requirements, current home-hub requirements, Face Recognition in Home, and Home automations.
- Logitech Support: Getting Started with Circle View
- Scrypted documentation: HomeKit integration
- Homebridge project documentation
- Reolink Support: Apple HomeKit compatibility
- U.S. Federal Trade Commission: How to secure home security cameras
- Reporters Committee for Freedom of the Press: recording-law overview
- Eve product support and installation guidance
The MiraGuard Home Editorial Team creates practical educational content about smart home automation, residential security, connected lighting, energy-efficient design, sustainable building practices, and everyday home technology. Our articles are prepared using manufacturer documentation, official product resources, public safety guidance, recognized technical references, and reputable industry publications. MiraGuard Home does not provide engineering evaluations, electrical services, architectural plans, security guarantees, or property-specific installation advice. Electrical, structural, high-voltage, and permit-related work should be handled by appropriately qualified professionals when required.